
本ページは広告が含まれています。気になる広告をクリック頂けますと、サーバ運営費になります(^^
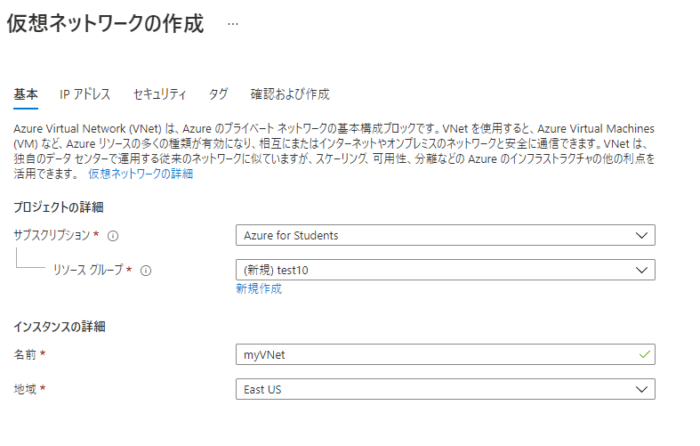
仮想ネットワークを作成します
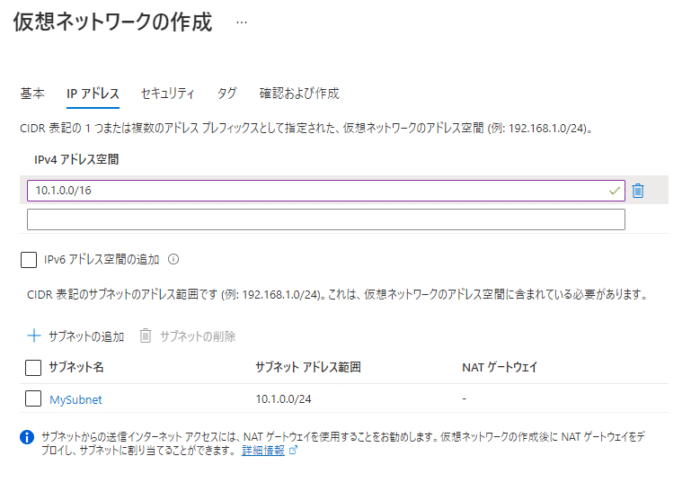
IPアドレスを設定します
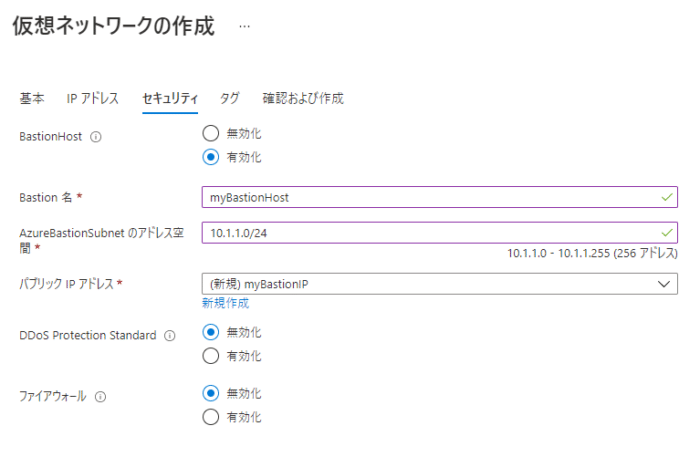
BassionHostを作成します
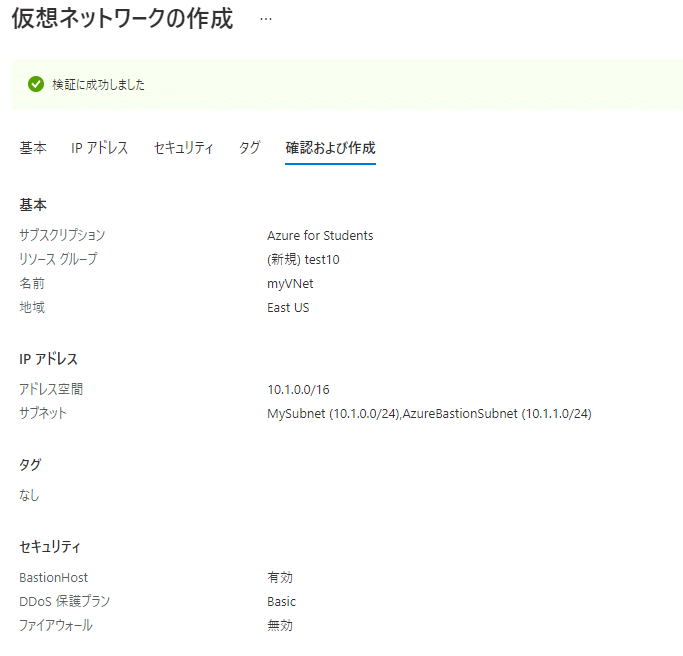
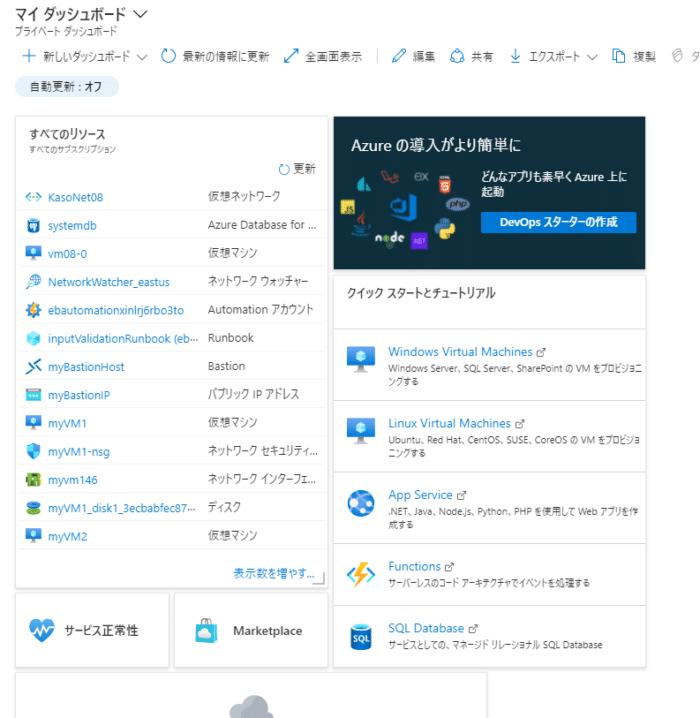
仮想ネットワークの全体的な設定はこんな感じ
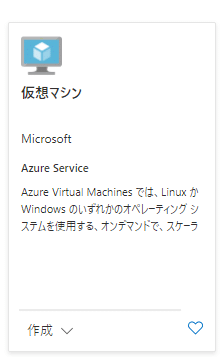
仮想マシンを作成します
仮想マシンを作成します
基本設定
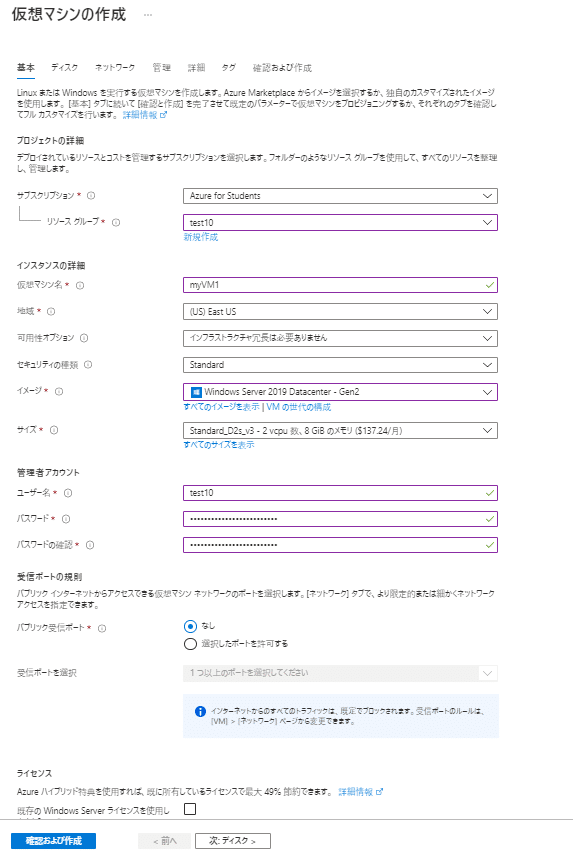
リソース グループ [test01] を選択します
インスタンスの詳細
仮想マシン名 「myVM1」と入力します
リージョン [(米国) 米国東部] を選択します
可用性オプション [インフラストラクチャ冗長は必要ありません] を選択します
Image [Windows Server 2019 Datacenter] を選択します
Azure Spot インスタンス [いいえ] を選択します
サイズ VM サイズを選択するか、既定の設定を使用します
管理者アカウント
ユーザー名 ユーザー名を入力します
Password [パスワード] を入力します
[パスワードの確認入力] パスワードを再入力します
受信ポートの規則
パブリック受信ポート [なし] を選択します。
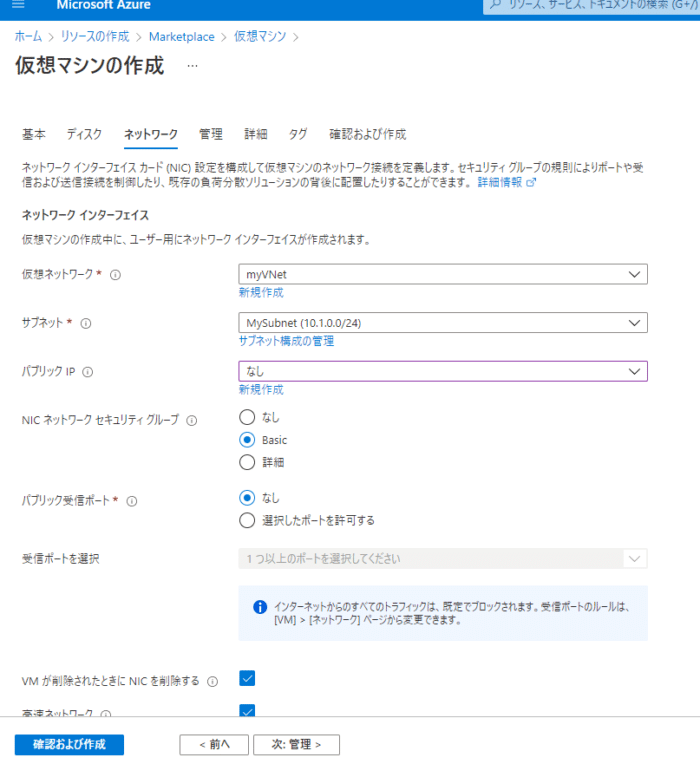
ネットワーク設定

仮想ネットワーク [myVNet] を選択します。
Subnet [mySubnet] を選択します
パブリック IP [なし] を選択します
NIC ネットワーク セキュリティ グループ [Basic] を選択します
パブリック受信ポート ネットワーク [なし] を選択します。
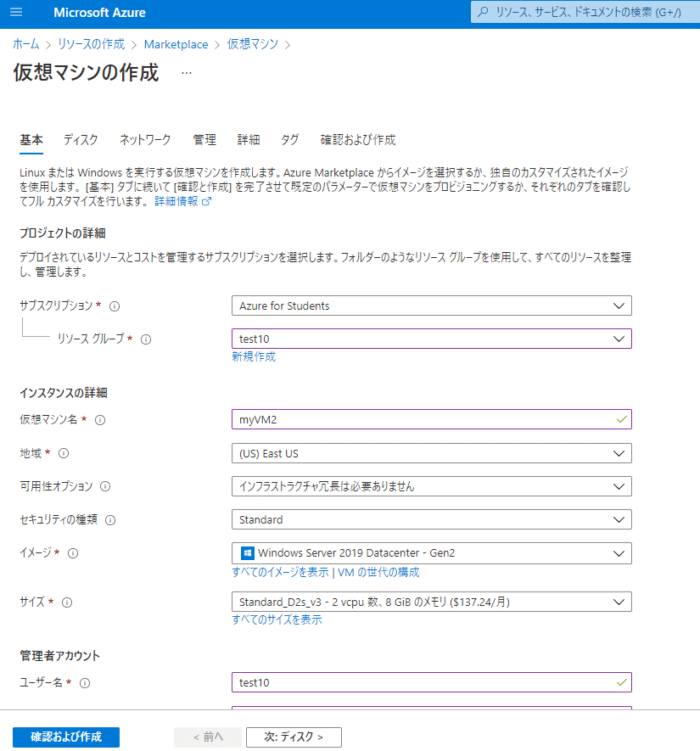
2つ目のVMを作成
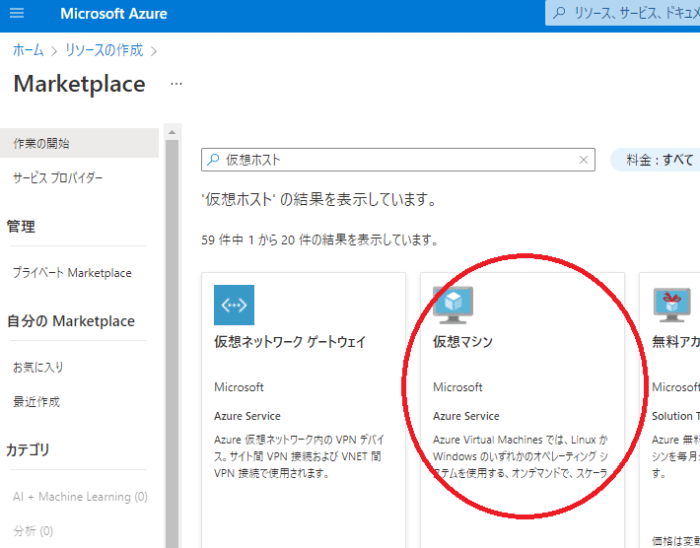
仮想ホストを検索して、仮想マシンを選択して作成していきます。2台目です。
※この時無料アカウントの仮想マシンを試そうと思いましたが、仮想ネットワークと同じリソースグループの中に作成する事ができず、通常の仮想マシンとしました。
基本設定は1台目と同じvm名だけ変更
2台目は、設定方法同じです。
2台目のネットワーク設定は1台目同等
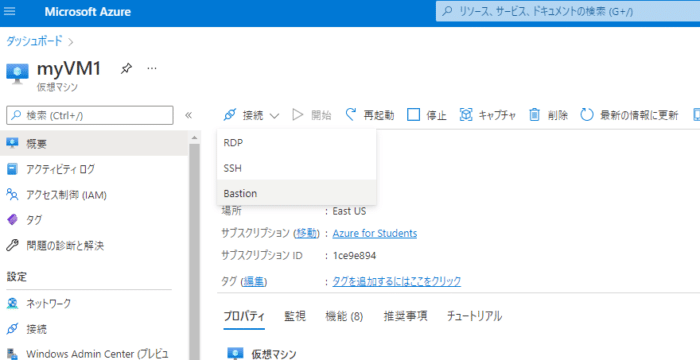
myVM1にBassion接続
ダッシュボードから、myVM1を選択
接続からBassionを選択
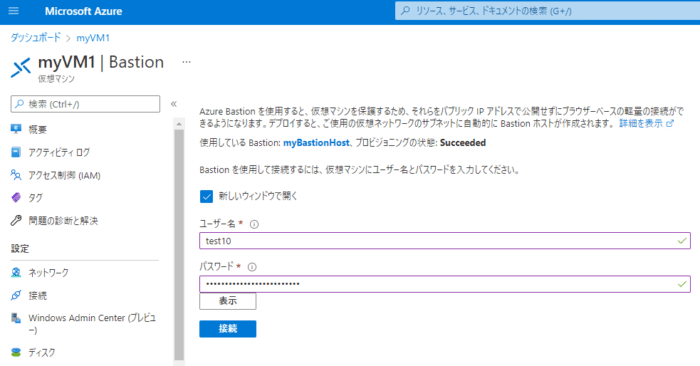
作成したユーザで接続します
myVM1に接続しました
myVM1のファイヤーウォールを解除
ping疎通を確認するため、ファイヤーウォールを解除します。
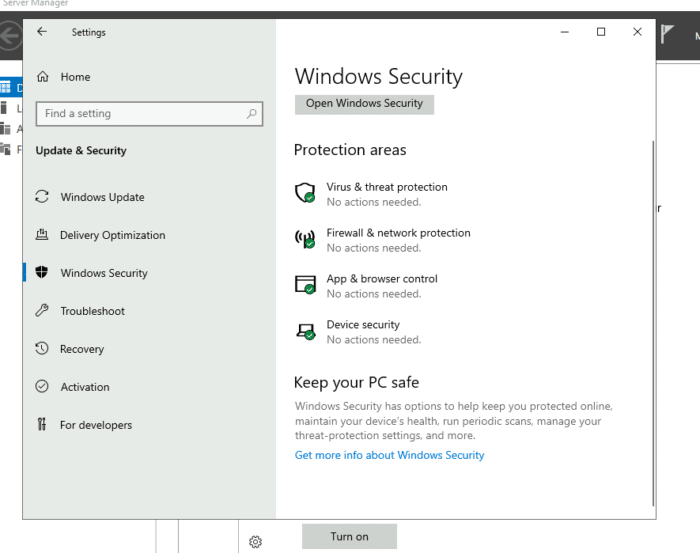
Firewall & network protection を開きWindows Defender Firewallをオフにします。PrivateもオフにしないとPing疎通確認できません。

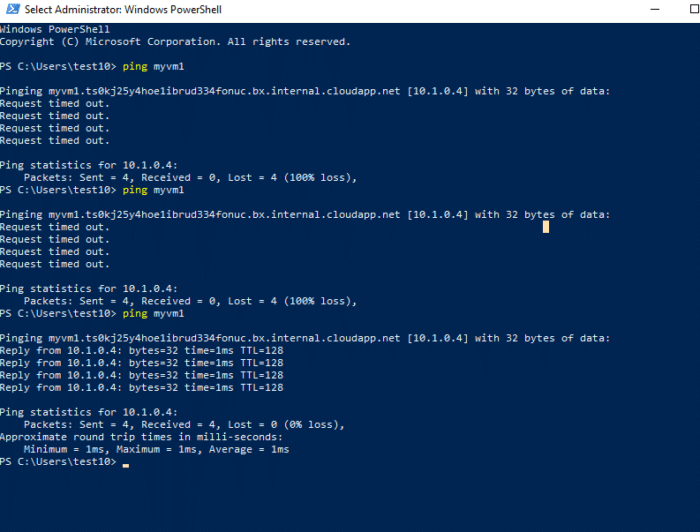
myVM2からVM1へPing
WindowsDefender が有効になっている間は Request timed out.にて、Ping疎通確認できません。
WindowsDefenderを無効にすると、Reply Fromが返ってきます
IPアドレスDHCP取得
IPアドレスは、仮想ホストを作成した時点で、自動的に割り当てられます。ホスト名で、名前解決できるようになっています。